MX Player is one of the most popular media players for Android devices, offering a wide range of features and customization options. One of its key features is the ability to add movie subtitles on mx player, allowing you to enjoy foreign language films or understand dialogue in noisy environments.
Let’s Fix How to Add Movie Subtitles on MX Player
If you’re wondering how to add subtitles to your movies on MX Player, follow this step-by-step guide, and you’ll be watching your favorite films with subtitles in no time
Step 1: Download and Install MX Player
If you don’t have MX Player installed on your Android device, head to the Google Play Store, search for “MX Player,” and click on “Install.” The app is available for free, but there is also a pro version with additional features that you can consider purchasing for an enhanced experience.
Step 2: Download Subtitles for Your Movie
Before you can add movie subtitles on mx player, you need to have the subtitle files available on your device.

There are several websites where you can download subtitles for movies. Some popular options include Subscene, OpenSubtitles, and YIFY Subtitles.

Make sure to download subtitles that match the exact title and version of the movie you have.

Step 3: Rename Subtitle File to Match Movie File
For MX Player to automatically recognize and display subtitles, the subtitle file name must match the name of the movie file. For example, if your movie file is named “movie.mp4,” your subtitle file should be named “movie.srt” (for SubRip format) or “movie.sub” (for SubViewer format).
Read: The Best 7 TV Shows on Netflix
Step 4: Place Subtitle File in the Same Folder as the Movie
Next, locate the folder where your movie file is stored. Move the subtitle file you downloaded and renamed in Step 3 to the same folder as the movie. Both the movie file and the subtitle file should now be in the same directory.
Step 5: Open MX Player and Load the Movie
Launch MX Player on your Android device. To load the movie, tap on the “Folder” icon located on the top-right corner of the screen. Navigate to the folder where you placed the movie and subtitle files. Once you find the movie file, tap on it to start playback.
Must-Do Activities Before Bed: Cultivating a Healthy Nighttime Routine
Step 6: Enable Subtitles
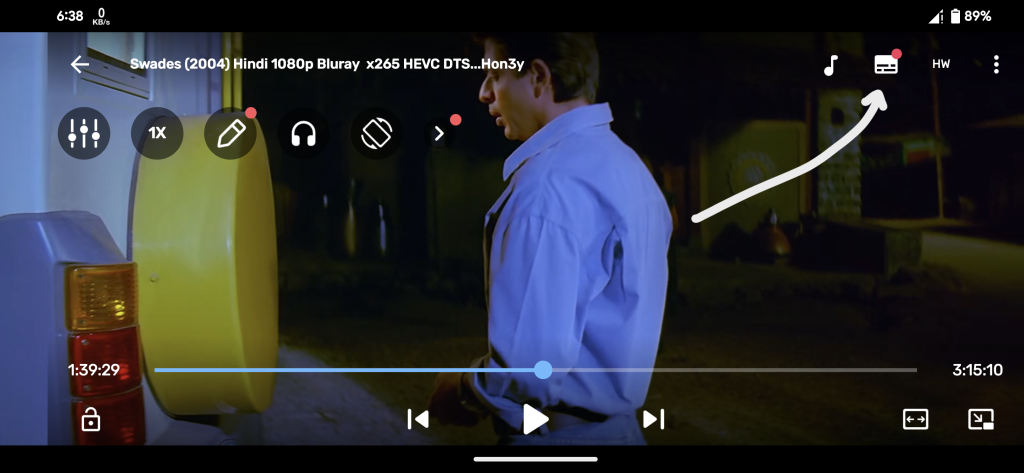
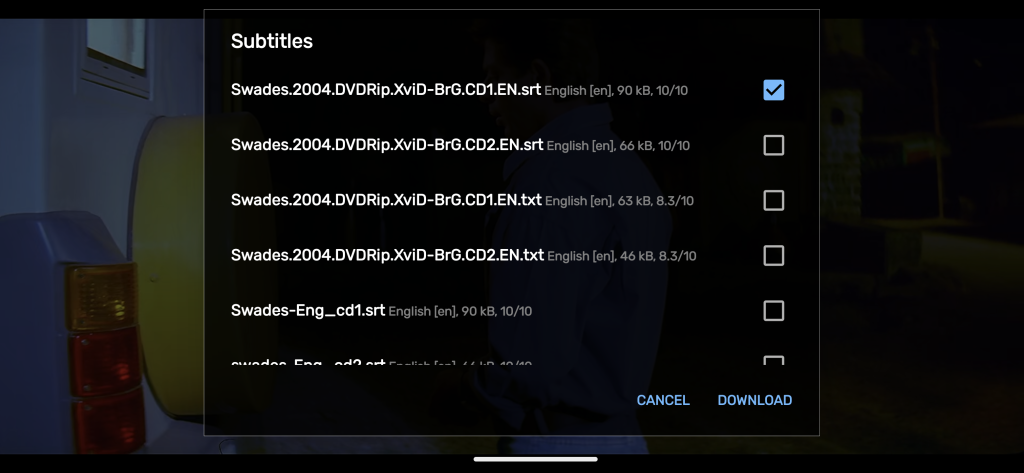
During movie playback, tap on the screen to reveal the playback controls. Look for the “Subtitle” icon represented by a text bubble at the top-right corner of the screen. Tap on this icon to enable subtitles. MX Player will automatically detect the subtitle file with the matching name and display the subtitles on the screen.
Step 7: Adjust Subtitle Settings (Optional)
MX Player offers various subtitle customization options. To access these settings, tap on the “Subtitle” icon while the movie is playing, and then click on the three vertical dots on the top-right corner of the screen. Here, you can change the font size, color, style, and even sync subtitles if they are not perfectly aligned with the audio.
Watch This video for better understanding
Conclusion of Add Movie Subtitles on MX Player
Adding movie on MX Player is a straightforward process that enhances your movie-watching experience, especially when watching films in different languages or in noisy environments.
By following this step-by-step guide, you can easily download subtitles, place them in the correct folder, and enable them while watching your favorite movies. MX Player’s user-friendly interface and subtitle customization options make it a top choice for Android users who want to enjoy their films with subtitles hassle-free.
