Perhaps your Laptop or Desktop keyboard is auto pressing! Even one or specific keys are not working on your keyboard, right? In this case, You can remap or disable the specific key of your computer easily by following the methods below. Let’s see how to disable a specific key on a laptop or desktop keyboard.
Requirements to Disable Specific Key
You have to download & Install KeyTweak software from google search. It’s free to use. This light software can be used to any Windows versions like Windows 7, Windows 8, Windows 10, Windows 11
How to Disable Specific Key on Keyboard
After completing the installation process run the software with Run as Administration
A pop up may come with a warning sign, Just skip or Press ok on it
Now the main interface comes up
Here You will see the Keyboard layout and control keyboard spaces

KeyTweak InterfaceNow you can disable any key from here.
Common Question: Can I recover the disabled key again? The answer is yes. You can restore the key again.
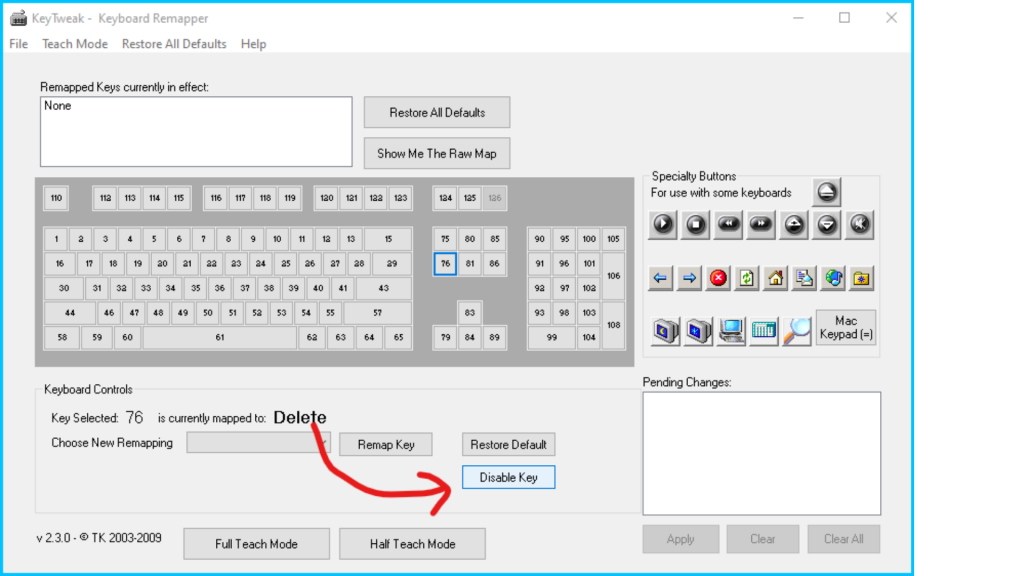
Okay, Let’s try to disable a key now, say you wanna disable your Delete key. So select the delete key [76]

After that click on Disable key option

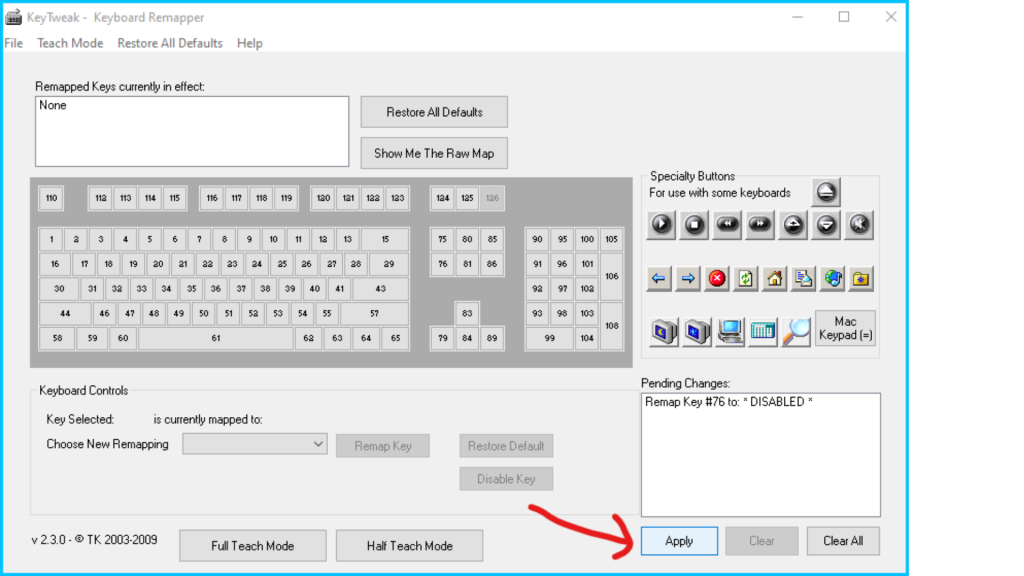
Then click on Apply

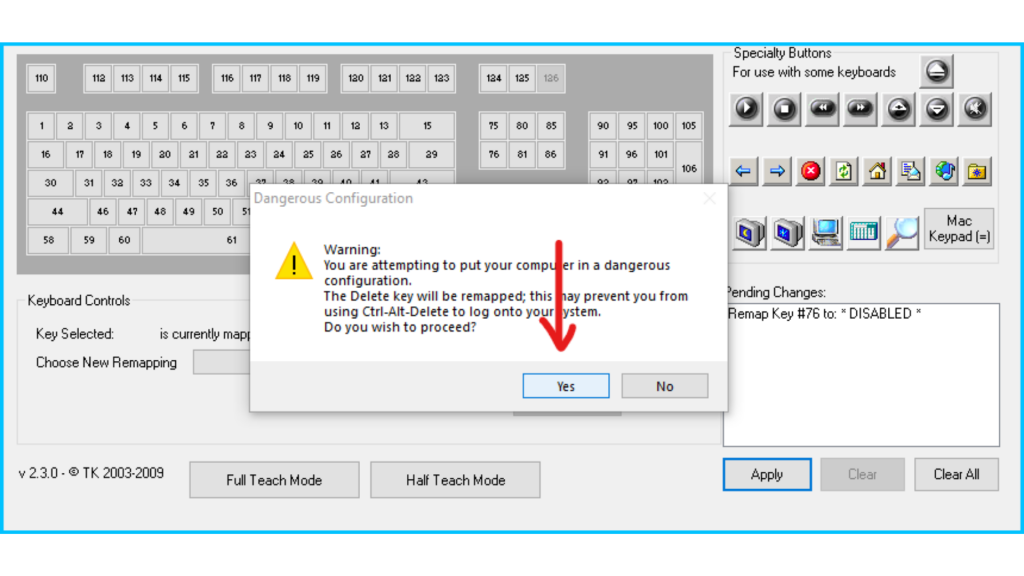
Now a pop-up will appear to Restart pc for changing the effect. Just restart pc and see.

Now your delete key won’t work anymore
Related: How to Delete An Extra Page in Word: Step-By-Step Guide
How to Restore the Disabled Key
The process is the same, just select Run the KeyTweak software with Run as Administration. Then select the disabled key and click on Restore default

If you want to restore all the disabled keys at once then click on the restore all defaults option

You can remap [Changing key position from one to another], disable a key, change keyboard layout by using this KeyTwaek software for free
If you face any problems kindly comment below
