You need to change the Windows looks, Right! A font can give a fresh look to your Windows. But, You have to choose a good font that is enough for you. There are different types of fonts already installed, like built-in fonts. And if you want then you can add or install any kind of font out of these fonts. So Tech Rider is here to teach you how to install & manage fonts in Windows 10 or any other Windows version.
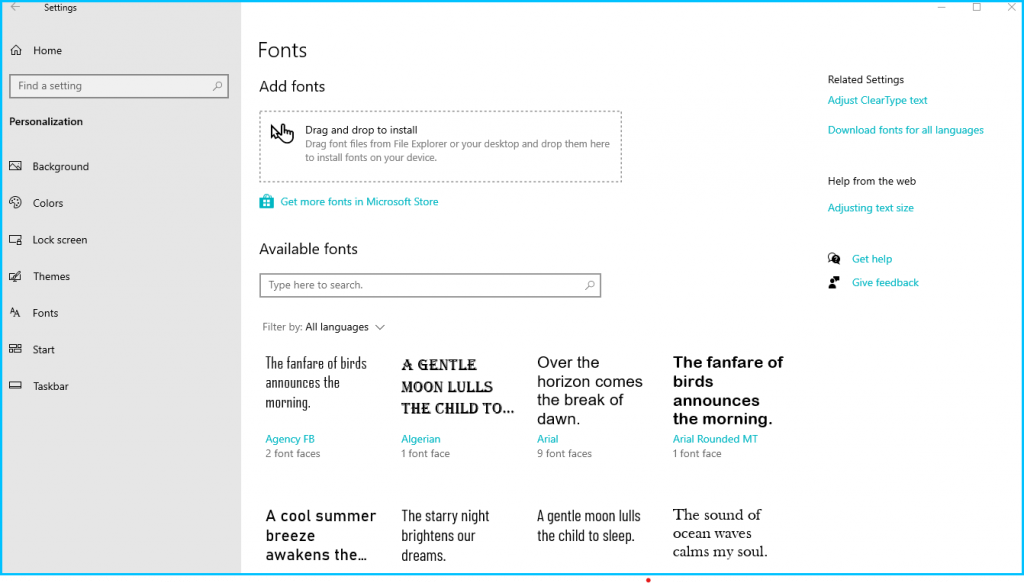
You can install fonts in your Windows 10 in four different ways:
- Install fonts through Microsoft store
- Manually install downloaded fonts from fonts sites [outside of Microsoft store]
- Install fonts using Windows font viewer
- Way to install fonts through drag & drop
Keep in mind
- Make certain that you are installing desktop fonts rather than web fonts.
- Unzipping zipped folders is required. Some os allow zipped folders though
- You need an user account and must have administrator rights on the Windows 10 PC.
How to install font in Windows 10 & Windows 11
Windows 10 & Windows 11 features, settings are nearly the same. So you can do this process for both OS versions. Now let’s see how to install a font in Windows 10 by using different methods.
How to install fonts through Microsoft Store in Windows 10
To install fonts from the Microsoft store you must follow the steps below:
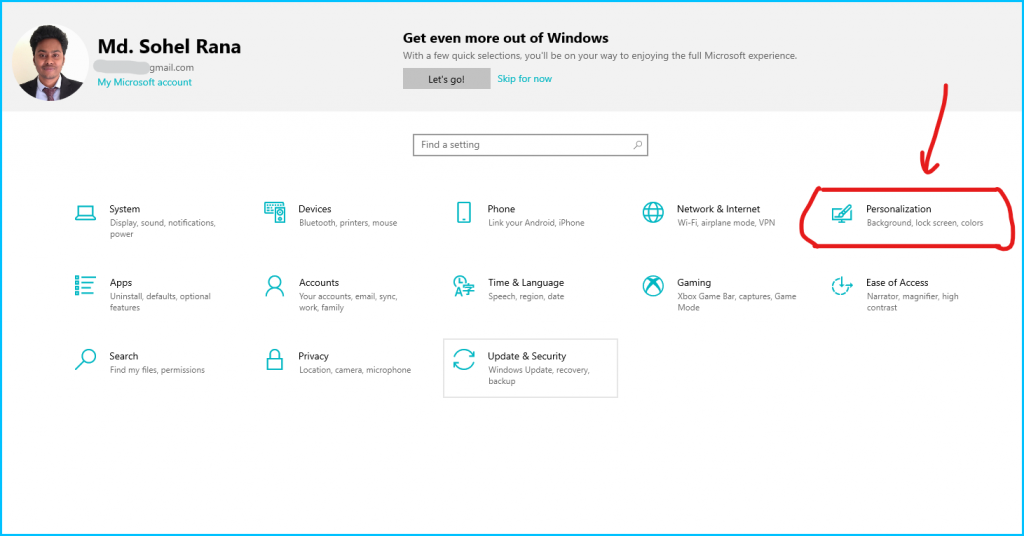
- Open settings option from the bottom left corner
- Now click on the Personalizations option
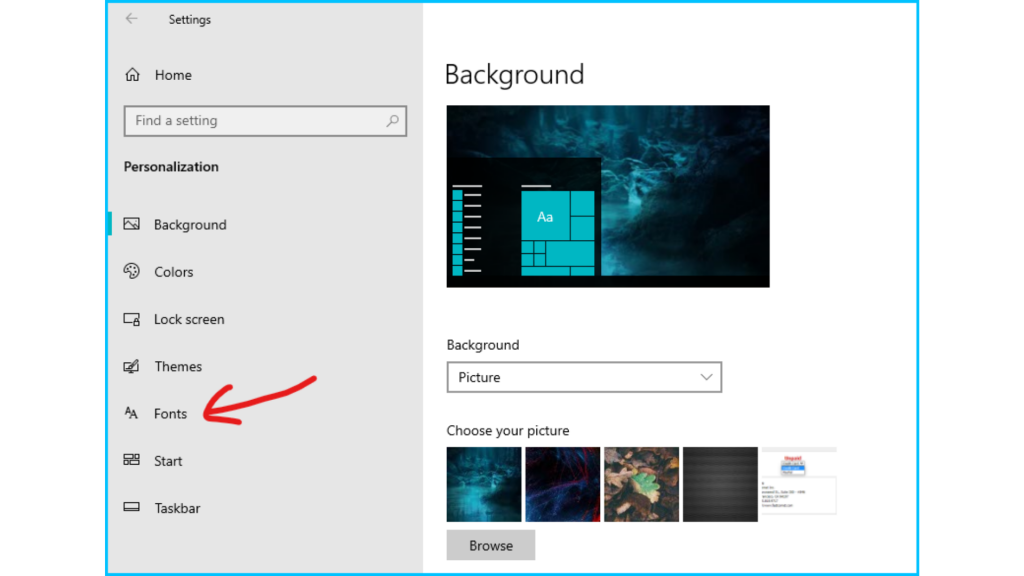
After then click on Fonts on the left side
Then you’ll see a link to Get More Fonts in the Microsoft Store, just click on it and then select a font

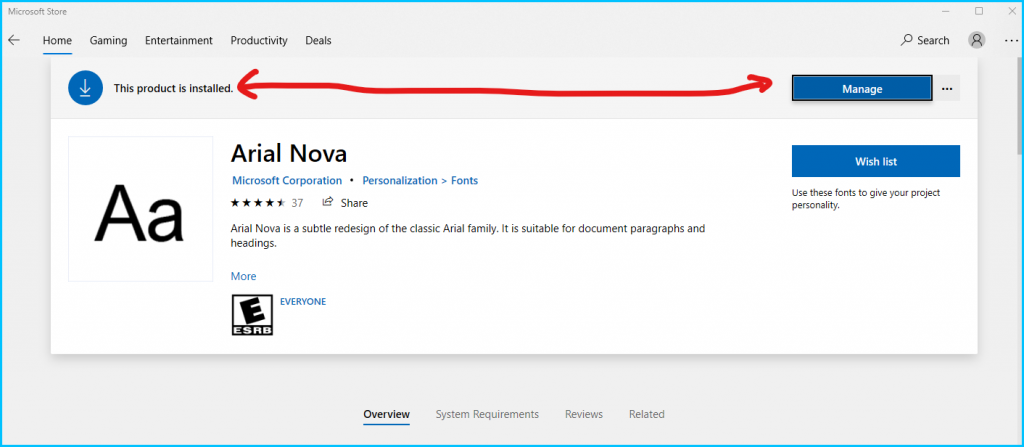
After picking the font, you’ll be sent to the font’s information page. This page contains information about the font. Click the Get button to begin installing the font.
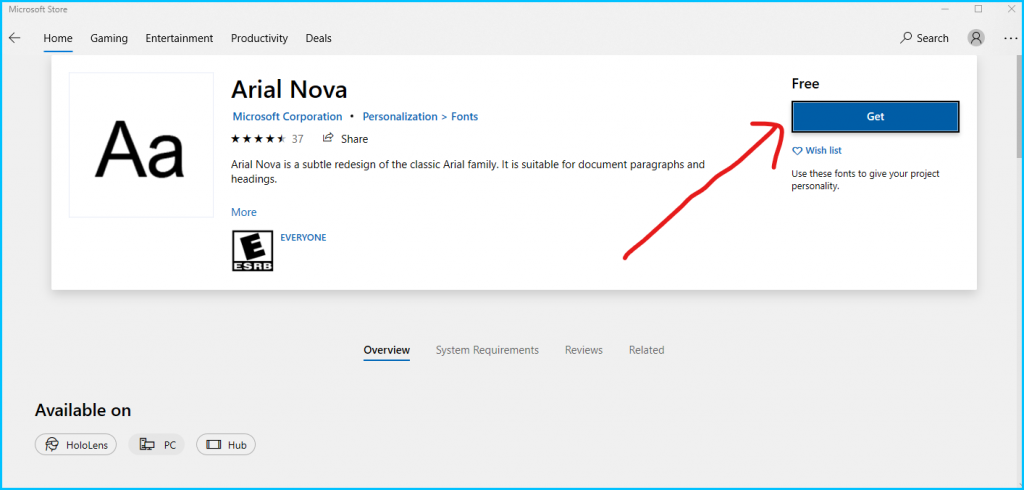
It is possible that the installation procedure will take several seconds to complete. In this case, the installation took less than 20 seconds.
How to install downloaded font manually in Windows 10
- Download your desired font from any website for Windows. Then unzip or extract all the fonts
- After you’ve extracted the file (or accessed it at its download location), right-click on it and choose Install. That’s all!
- It is important to note that you can install either TrueType (.ttf) or OpenType (.otf) font files.
How to install fonts using Windows font viewer
If you’ve acquired an appropriate TrueType (.ttf) or OpenType (.otf) font files from the internet, you can install it in a variety of methods. The first method is to inspect the font file directly. Using the Windows Font Viewer, you can preview the font and install it. Let’s see
Unzip or extract the font zip file which you have downloaded to a specific location
Now right-click on the font and click on Preview
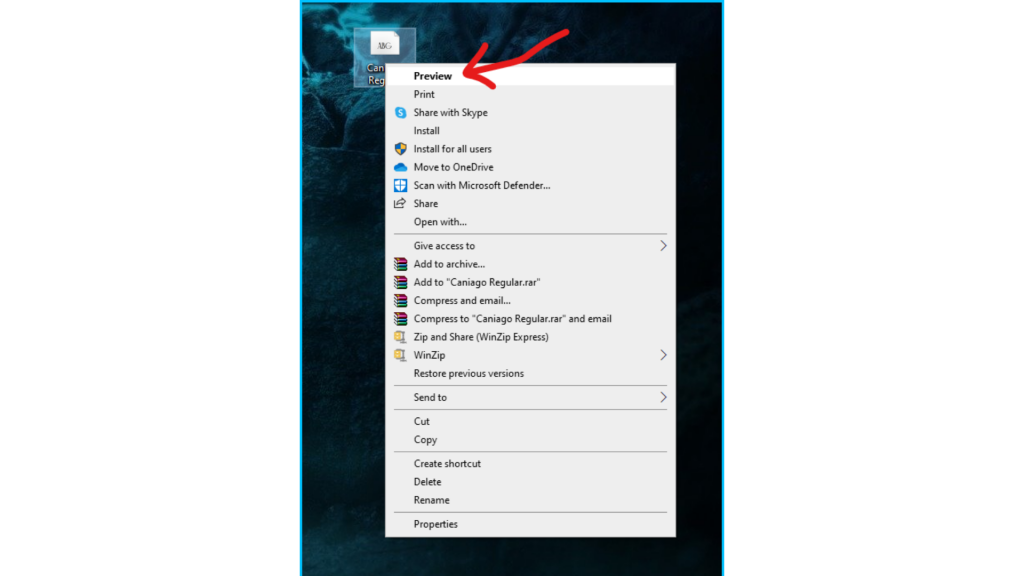
Then click on the install button & wait for the installation process to be done

How to install a font in Windows 10 through drag & drop
You can try this method in two different ways. Let’s see how to do that. At first, you have to download the font and extract it from its zip file if necessary. Now
Way 1: Use control panel
- Navigate to the taskbar’s search box, type Control Panel, and select the related result
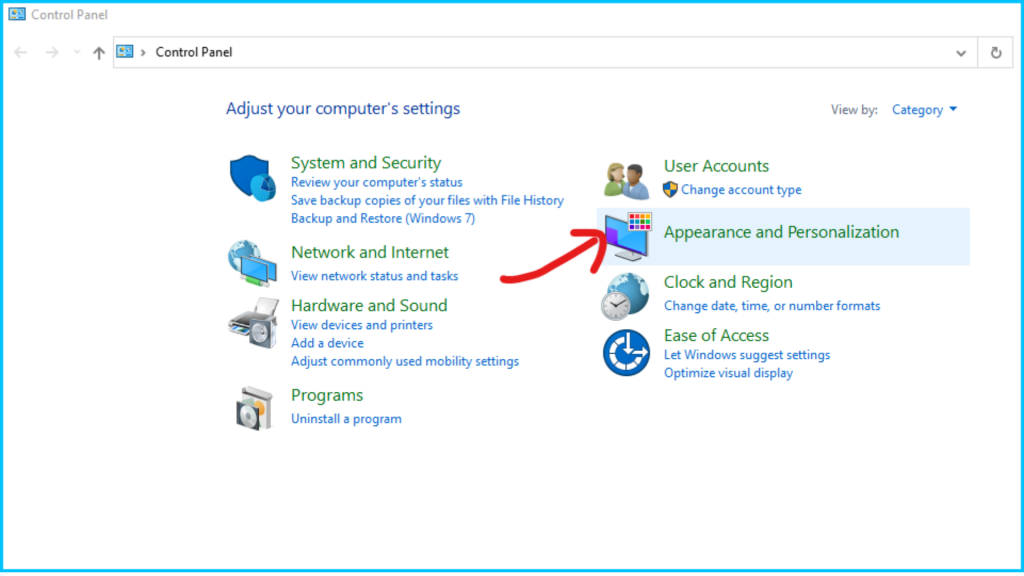
- Then select Appearance and Personalization in the Control Panel
Now click Fonts in the main window
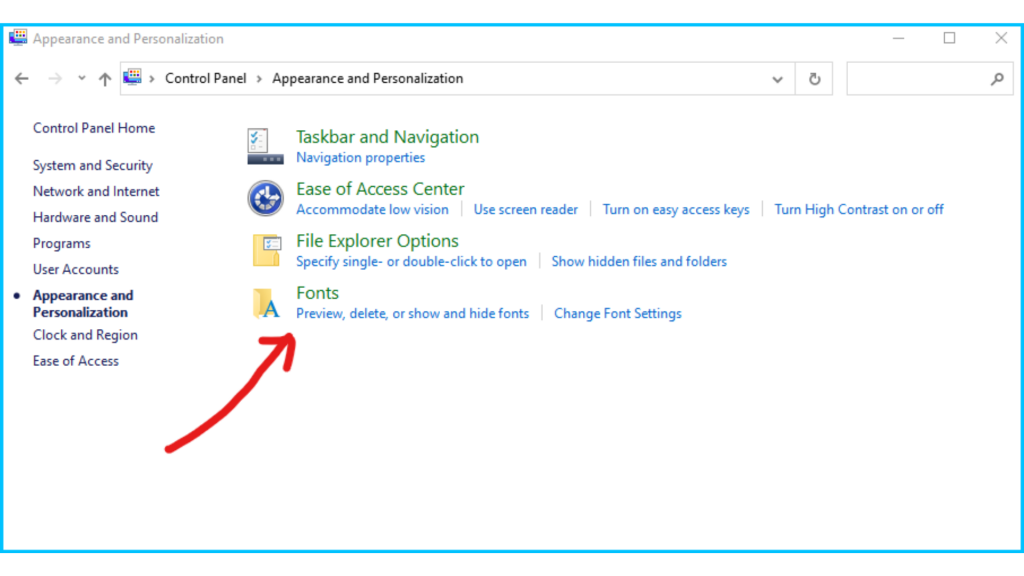
Simply drag your new font from the destination location in File Explorer into the font window once your font library has loaded
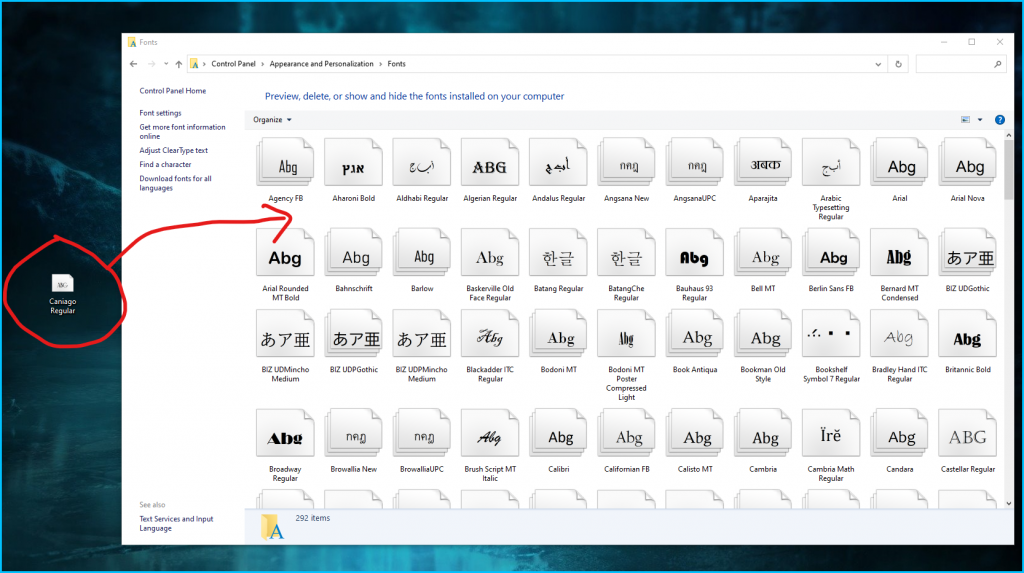
As it is installed, a little progress bar will appear. When finished, the font is ready to use
Way 2: Use the Settings option
- Open settings option from bottom left corner
- Now click on Personalizations option and click on Fonts at left side
- Here you will see a box under Fonts text written as “Drag and drop to install”
- Now just drag the font upon the box and drop it here
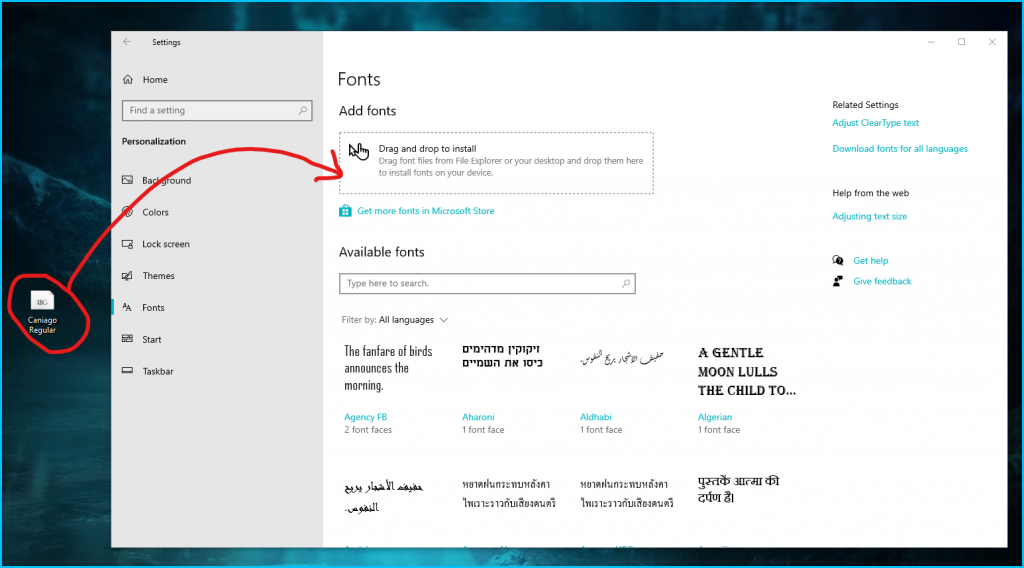
Done!
How to install a font in Windows 8
You can install fonts on Windows 8 using the two methods mentioned below. Try right now
Method 1
- You must unzip the folder containing the fonts
- If fonts are zipped, they cannot be installed
- Select Install from the context menu when you right-click on the font file, done!
Method 2
- Go to the start menu and type “search.”
- In the options, look for Fonts
- To open the Font folder, click on the Fonts Folder
- To install the fonts, drag and drop or copy and paste the unzipped fonts files into the Fonts folder
How to install a font in Windows 7
To install fonts on Windows 7 then First, unzip the fonts. If fonts are zipped, they cannot be installed. After that, select ‘Install’ from the context menu when you right-click the font file.
How to install font in Windows Vista
If you want to install fonts on your Windows Vista then follow the steps below:
- First, unzip the fonts. If fonts are zipped, they cannot be installed
- Then just select ‘Control Panel’ from the ‘Start’ menu
- Now you have to click the ‘Appearance and Personalization’ button
- Then select ‘Fonts.’
- Select ‘File,’ then ‘Install New Font.’
- If the File menu does not appear, press ‘ALT’
- Navigate to the location where the fonts you want to install are stored
- Choose whatever fonts you want to install
- To install the fonts, click the ‘Install’ option
- Done!
How to install font in Windows XP
If you want to install fonts on your Windows XP then follow the steps below:
- First, unzip the fonts. If fonts are zipped, they cannot be installed
- Now select ‘Control Panel’ from the ‘Start’ menu
- Choose the ‘Appearance and Themes’ option
- From the ‘See Also’ panel on the left of the screen, select ‘Fonts.’
- Select the ‘File menu’ and then ‘Install New Font’ in the Fonts box
- Navigate to the location where the fonts you want to install are stored
- Choose whatever fonts you want to install
- To install the fonts, click the ‘OK’ button
- Done!
Learn more on How to Delete An Extra Page in Word: Step-By-Step Guide
How to delete or uninstall Fonts in Windows 10
You may end up with more fonts than you need, or you may wish to eliminate a few fonts. It is simple to delete them. Keep in mind this font deletion process is nearly the same for all the Windows OS. Just try yourself in the ways mentioned below.
- Enter the Control Panel into the Windows 10 search bar
- Choose Appearance and Personalization, then Fonts
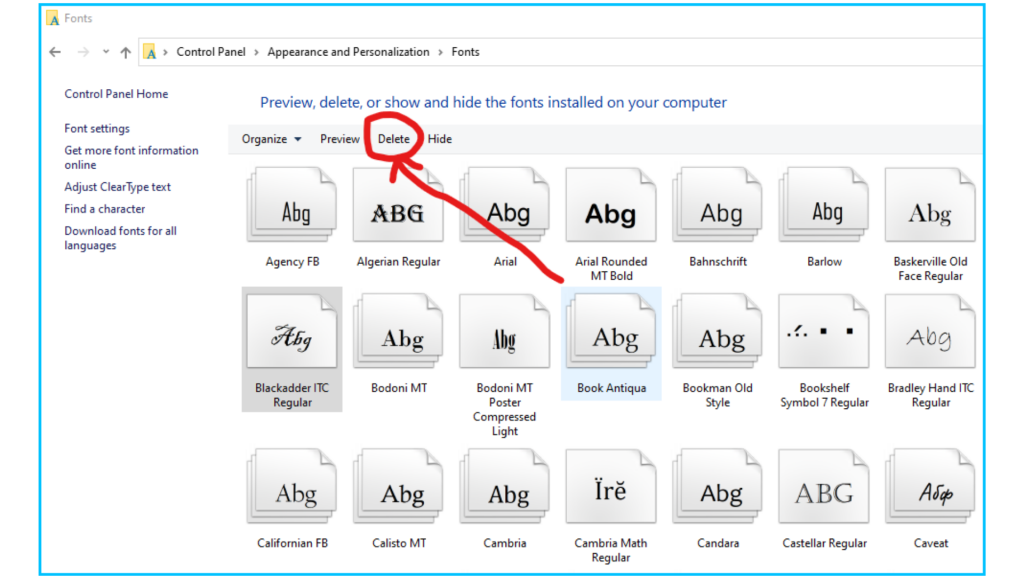
- Scroll through the list until you find the font in question, or use your keyboard to search for it. Choose it, then delete it from the top bar menu. Alternatively, right-click the font and select Delete from the subsequent pop-up menu
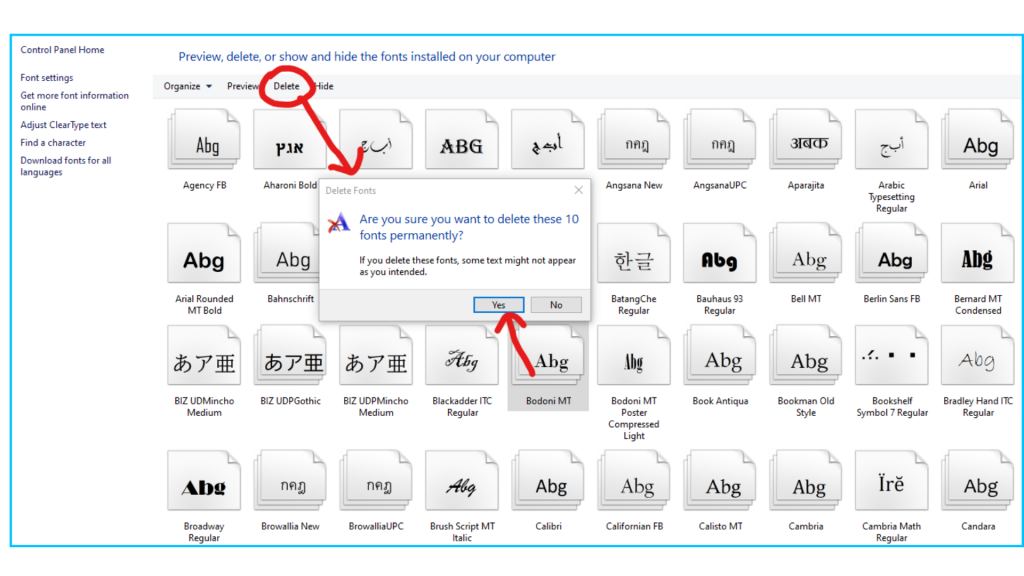
You will be asked to confirm by the program. If you choose Yes, the font will be removed from the system
You can also try this alternative way: Using Windows settings app
To do so, right-click the Start button and select Run from the menu that appears. In the Open box of the Run dialog, type the command ms-settings:fonts and hit Enter or click OK
Then, in the Available fonts list, type the name of the font you wish to uninstall into the search box. Click the font name in the search results to access its properties
Click the Uninstall button once you’re in the font’s properties window. By clicking this button, you will uninstall the fonts from your computer.
If you have faced any problems, kindly leave a comment below.
